Saturday, June 30, 2012
Exploding 4th Of July! By Ms. Pebbles
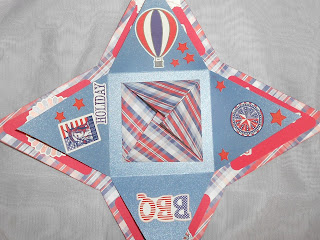
For my 4th of July project, I thought to myself, since the fireworks will be exploding, why not make a 4th of July Exploding Box! Now I know that the technical name/use for these are boxes BUT, to me these can be cards, minis and boxes! They come in many different shapes and I decided to go with the pyramid shape!
I used our Echo Park 4th Of July paper kit for 2 of the layers of the box as well as the lid. The title and embellishments on the outside also came in the kit!
Here's the view when it's completely exploded! The inner most layer has a circle with a star and some stripes in the middle that I cut from one of the papers in the kit. I used my eCraft Purpleberry machine to cut the white triangles. Here's where I think the possibility of mini can start. Instead of the circle, you can adhere a photo or for a card, you can put a sentiment there. Or quite possibly photos and embellishments on all tabs! :) Just some ideas! Here's some more views.
On this layer, I used all sticker embellishments that comes in the kit.
I used the same sticker embellishments on this layer as well and some more triangles that I cut out using my eCraft. The possibilities are endless using this kit, I love it! I also have plenty of paper left to do a couple of layouts as well as cards! Thanks for looking everyone and have a safe and Happy 4th of July!!! :)
Friday, June 29, 2012
Cutters Creek Design Team Announcements!

Thursday, June 28, 2012
4th of July Basket Tutorial by Tee
Hi All, 4th of July is just around the corner. I wanted to make something to hold the silverware (err plasticware) and napkins for each table. I saw this basket online somewhere and wish I could give credit to it's original designer but I can't find the website so I recreated it by memory and am here to share with you how I did it.
Supplies:
12x12 Sheet of Paper (or 6x6, 9x9)
ScorePal
Adhesive
1 1/4" circle punch (or cut from your cutter)
Embellishments of your choice
Let's get started.
1) Score your paper at 4" and 8". Turn and Score again at 4" and 8" (basically divide your paper into three sections)
2) Cut down the score lines at 4" and 8" down 4". (basically down one box on each end, see sample)
Then cut the center flap into a triangle and both side flaps into thirds. It will look like this.
3) Add adhesive on two of the three strips as see here
4) Bring the strips up on each side as show here
5) Hold the triangle flap up and mark where the one set of flaps hang over the triangle flap and trim.
6) Adhere the triangle flap and cut off the tip or fold it over to hide.
7) I then cut two circles, folded them in half and cut a slit down the middle. I cut a strip of paper to use as the handle and added on end into the slit in the circle. Adhere the circles over the tip of the triangle flap then decorate..........
Hope you enjoyed the tutorial and make one of your own.... ~~Tee
Wednesday, June 27, 2012
4th of July Upcycle by Laura C
I've got an idea for you....for the 4th,
or for any event, and it's a great way
to use your stash!
This little "favor" tube:
These are super simple, and even better....
they are a great upcycling opportunity!
I filled it with sparklers, a flag and some
glow sticks....all ready to party on the 4th!
You start with a paper towel tube, and cut
it in half, so you get 2 tubes to use:
Then the fun part is to decorate it any way
you want! For this I used Candy Apple Red
and Denim Glimmer Mist, punched out plain
stars to use as a mask, and spritzed plain
white cardstock to get this:
I used ScorTape to close the bottom of the
tube and also used it to adhere the trimmed
misted piece of cardstock (I trimmed it to
around 3&1/2" long x 6" wide).
To make the star borders, I used a Cuttlebug
embossing folder (the Measure to Measure
set) and Distress Ink:
I inked up the folder in Stormy Sky before
putting it through the Cuttlebug to get the
blue version, and just ran the plain cardstock
to get the white star strip. I layered these
pieces over a strip (about 2&1/2") of red
paper. After that, it was decorating with
items from my stash....the red pompon trim,
the twine and buttons, and a touch of
Kaiserkraft bling too--ScorTape is a great
adhesive to hold everything....glossy accents
would work well too. .
Here is a close up:
With the 4th coming up....this is a great little item
to hand out--or have a cute basket filled up with
them as a little favor for everyone to take home.
Hope you enjoyed today's post and that you
all have a safe, happy 4th of July!
Monday, June 25, 2012
The Great Outdoors Layout with Lori
These pictures are from a field trip to a local nature center. The papers in this kit fit perfectly! I cut one of the blocks from the Journaling paper to use as a title, and added a sticker element as a subtitle. I used some more sticker elements and added them to some journaling circles - you can use punches or a cutting machine for the journaling shapes.
| I used one circle to note the event and year. |
| I used another to point out how excited my daughter was to be there. |
| And I used a third, completing a visual triangle, to add a fun little image. |
One little tip to note: one of the ricrac strips I added was a little bulky (the one at the top), so I popped up my smaller photos over it with foam adhesive so they didn't look lumpy. To balance things out, I also popped up the small photo at the bottom right.
You can make a similar layout with just a few items:
- The Great Outdoors collection kit, Echo Park Paper
- coordinating Cardstock (I used CTMH)
- Scotch Quick Dry Adhesive (great for adhering the ric rac!)
- Scotch Pop-Up Foam Squares
- ATG adhesive
Sunday, June 24, 2012
Happy 4th of July by Deanna M
I have a quick 4th of July card for you today. Perfect to use as a party invitation or to just let someone know you were thinking of them.
My card base is white Bazzill Simply Smooth card stock cut and scored to make a 4 1/4" X 5 1/2" card base. I added a dark blue mat cut at 4" x 5 1/4" and a red mat cut at 3 3/4" X 5". Both of these mats are Core' de nations Card stock (Cutter's Creek is out of this paper but Kim can likely order it for you). I then used a piece of the Whitewash Cut and Emboss card stock. I ran that through the Cuttlebug and embossed it with the Stars embossing folder and sanded it so that the red from the back side showed through. I cut the 4th of July image from the Stand and Salute cartridge at 2 1/2". I cut the shadow twice once out of white and once out of red and offset them just slightly. I cut the top layer out of a dark blue and added some Midnight Blue stickles to the blue layer. Popped up the sentiment with some foam tape. I also added some blue and white and red and white Doodlebug bakers twine to my card. Finally I added a couple of star buttons from my stash and threaded them both with more of the twine and tied a knot.
Friday, June 22, 2012
Window Card by Deanna M
I saw the idea for this card last December in a card making magazine and have been wanting to make one. My card base is white Bazzill Smooth card stock cut and scored to make a 4 1/4" X 5 1/2" card base. My patterned papers for the curtains is from the My Minds Eye paper pad Miss Caroline All Dolled Up. Using the Plantin Schoolbook Cricut Cartridge I cut the scallop at 1" and then trimmed it to fit across my card. My "curtains" are cut at 1 7/8" X 4". I ran the paper through my paper crimper to get that pleated look. For my window I cut the image from the Christmas Solutions cartridge at 3" out of the Mod Squad Cut and Emboss Paper by Core'denations. I then cut the view for my window from a scrap from the Echo Park Summer Paper pad from last summer. I adhered the view down straight to my card. I attached the window with some of the ASI 3D Clear Foam. I also attached the curtains and the valance with some foam tape. To finish it off, I added a couple of bows.
Wednesday, June 20, 2012
A Simple Birthday Card
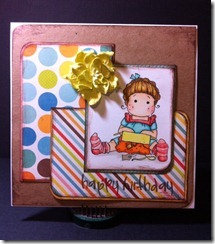
I’ve noticed that when I see cards that other people have made that are really simple and uncluttered, I love them. However, when I make one myself, I hate it. I always feel like I need to add more and then I stress over choosing the correct embellishments. I’m now determined to master the simple look. For this card all I’ve used is different patterns of paper, a stamped image, and one simple embellishment.
I wanted the main focus of my card to be the image. This is one of my favorite Magnolia stamps. It is called Unwrapped Tilda. Kim does not currently have this particular stamp in the store, but if you ask nicely, she may be able to order it for you. I have colored Tilda with my copic markers to match the colors in the Echo Park paper I used. I love these paper pads. They make it so easy to pick coordinating patterns. After I assembled my card, I had to add one embellishment. I thought this yellow gardenia from Cutters Creek matched the bright and cheery attitude of the card. I hope I have inspired you to keep it simple sometimes.
Cutters Creek Shopping List
Monday, June 18, 2012
Vintage Americana by Laura C
vintage feel to them....love that "country" style. This project
takes a $1 sign from the dollar store, and makes it into a
piece of vintage Americana decor.
The piece started like this:
If you look in the upper right corner of the sign....
I started inking it with Vintage Photo Distress Ink.
The entire surface was covered. Next step:
I used Tim Holtz Tissue tape on the white stripes....
and trimmed it to fit, to get this:
The next step was to rub over the tissue tape with
more of the Vintage Photo Ink, and then painting
the entire piece with Rock Candy Crackle paint.
After it dried, I used more Distress Ink....this time
I dabbed on some of the Walnut Stain to leave this
finished project:
A few pieces of the Rock Candy flaked off to give it
a true "vintage" feel....LOVE the way it turned out!
I did finish it off with a coat of spray sealer to make
sure everything stayed put.
Inspired to make a little "Vintage Americana" of your own?
I hope so.....it's fun home dec summer project!
And like the tissue tape? Kim can order this in for you....
and she carries the awesome tissue tape dispensers in
store....they make the "trim to fit" so much easier!!
Saturday, June 16, 2012
Endless Card by Ms. Pebbles
Today I made what some like to call a "Endless Card" or the "Never Ending Card", using the Echo Park Country Drive Collection Kit.
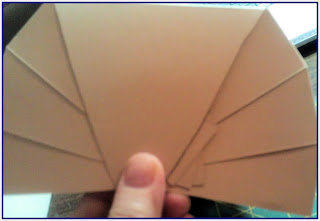
Because this card has a series of folds/openings, here's a quick video I did to demonstrate how it works and some of the products I used to embellish it that you can order from Cutters Creek. Enjoy!
Products used: Echo Park-Country Drive Collection, Stickles-Diamond, Distress Ink Pad-Mustard Seed, Kaiser-Black Rhinestones, Score Tape
Thursday, June 14, 2012
Center Step Card Tutorial By Deanna M
My cupcake was cut from the Straight From the Nest cartridge (which Kim can order for you if you want it) at 2 3/4". Because the little holes for the sprinkles were so small I opted to add some liquid pearls in Hydrangea and Key Lime to them instead. I attached my cupcake to my card with an action wobble.
I did a short video for you to help explain how I made this card. I first saw this idea on SplitcoastStampers. I hope the video helps you understand how this card works.
Here is a side picture of the finished card.
I sure hope you will give this a try. If you do let me know what you think. Thanks for visiting.
Tuesday, June 12, 2012
4th of July Wreath Tutorial by Tee
Monday, June 11, 2012
July 4 Layout with Lori
July 4th is more than just one day for me. My hometown celebrates for an entire weekend, and we have a family reunion that Sunday. So lots of pictures of course! To make my papers stretch, and really help my photos stand out, I like to use a cardstock base in a coordinating color and use smaller pieces of the patterns. Doing this also speeds me up as I don't feel the need to use photo mats like I normally would when I use larger amounts of pattern.
While the layout has a simple design, it doesn't have to look basic. I glued down some chipboard brackets from my stash using Scotch Quick-Dry Adhesive. I coated both brackets in Silver Stickles, and also used them to outline the stickers I used for my title. Then I pulled out some Distress Stickles in Fired Brick and Faded Jeans, and alternated the colors to outline the circles in my design. After drying, it's all ready to be put in a scrapbook.
Supplies used to make this layout:
- 4th of July Mini Theme Collection Kit, Echo Park Paper
- Ranger Stickles, Silver
- Ranger Distress Stickles, Fired Brick and Faded Jeans
- Scotch Quick-Dry Adhesive
- Cardstock (I used Grey Wool from CTMH)
Sunday, June 10, 2012
Friends Always!
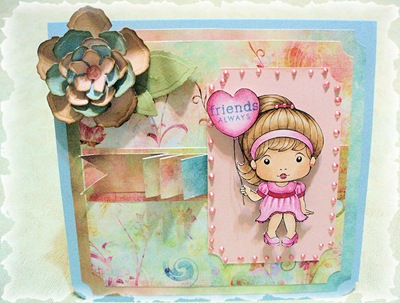
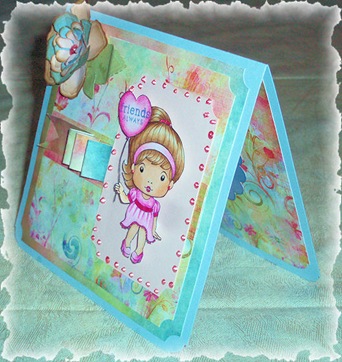
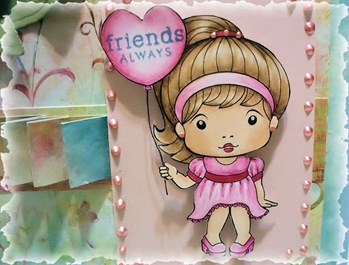
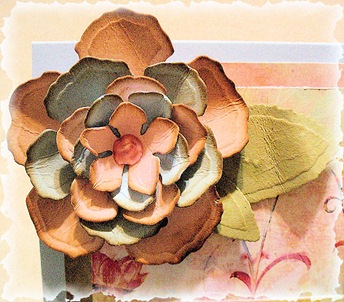
Today I bring you a card made with the cutest digital image by La La Land called Heart Balloon Marcie. I colored her and the balloon using Prisma Colored Pencils and the Gamsol technique. The papers used to make the flower, pleated ribbon and base of the card are by Prima called Fairy Flora. Cutters Creeks Store does not carry the Fairy Flora Paper Pad but there are other paper pads by Prima that are just as pretty. Check them out!
The pretty bling surrounding Marcie and the center of the flower were made using Liquid Pearls, Petal Pink by Ranger. If you haven’t tried liquid pearls you just need to buy at least one color, your favorite color, and use it on your creations. It is so versatile too. Besides using it on paper it can be used on fabric too. You can use it straight from the bottle, paint it on with a brush, or dilute it with water to use as a glaze.
The flower was made using a Spellbinders Die called Rose Creations (it comes with 9 die templates). And I used Vintage Photo Distress Ink Pad on the petal edges of the flower. Check out all the other beautiful shades in the Distress Ink Pad line.
You can click on the photos for a larger view.
TIP: When I cut out the image and a balloon is involved; I cut away the drawn black string and replace it with black thread.
Thank you for stopping by, Fran.
Thursday, June 7, 2012
My Mind's Eye Meets Tim Holtz
I hope you enjoyed my project! I also hope that I have inspired those that are afraid to paper craft out of their comfort zone will give it a whirl. I really has a lot of fun making this item and now I think I would love to do more projects like this as this would make a really great gift!


